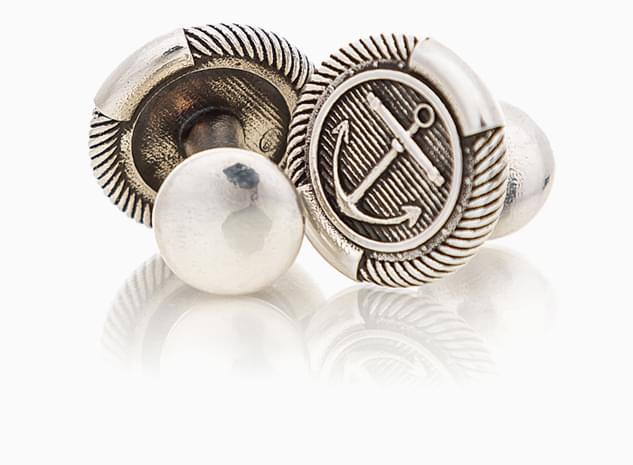
 Anchor Cufflinks by Andrei Dan-Gabriel
Have you made a great 3D printed product? Then why not
start selling it and making some money? Open a shop and
sell your designs! Once a month, we will pay you a fee for
all your sold items. Follow only a few simple steps to make
it happen.
1. Enable Your Vendor Profile
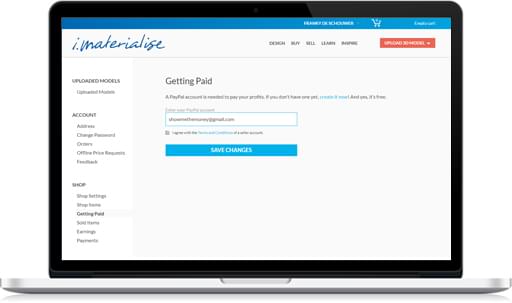
1. Enable Your Vendor Profile
Log in to your account and get started by going to the Getting Paid section in your profile. Provide us with a valid PayPal account and accept the terms and conditions of a vendor account. We need this information so we can pay you out for every sale you make. If you don't have a PayPal Account, you can set up one here for free.
2. Setting up Your i.materialise Shop
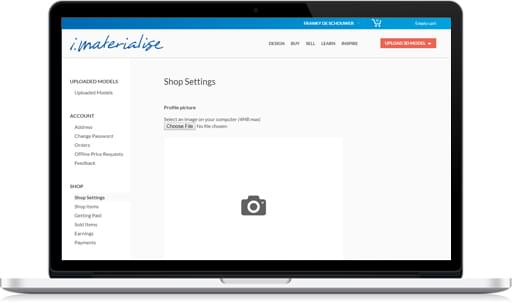
2. Setting up Your i.materialise Shop
- Profile Picture: If you’re running your shop as a designer, uploaded a picture of yourself here. Show people who's behind the products they buy. If you have a brand, you might want to upload your logo here.
- About You: What’s your designer name or the name of your brand? Where are you from? And do you have a website where people can a dmire your work?
- Description: ell a little something about yourself and what your shop is about.
- Shop URL: The web address that matches your shop name is based upon the name you registered with. You can only change it once. Choose something unique so people can easily find you. Your shop URL becomes i.materialise.com/shop/designer/YOURSHOP
- Shop Banner: If you want to further brand your shop, you can additionally upload a shop banner. A shop banner has a fixed dimension of 880 x 220px.
3. Adding Products to Your Shop
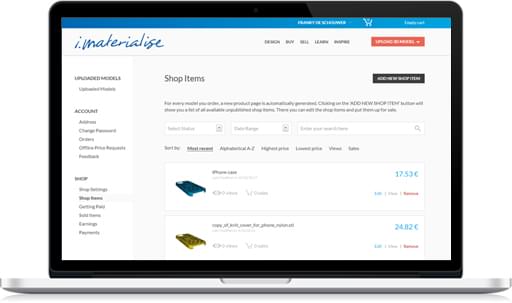
3. Adding Products to Your Shop
For every model you order, a product page is automatically generated. Clicking on the ‘ADD NEW SHOP ITEM’ button in the Shop items section will show you a list of all available unpublished shop items. There you can edit the shop items and put them up for sale.
If you want to sell any of your items or just show them, simply press 'EDIT'. This also means we only let you sell products that have been printed.
- By default, your models are private and set to ‘Not Published’. Select either ‘Display Only’ or ‘Offer For Sale’ to make them public. But first, start completing your product page and set the desired designer fee (markup) for your products.
- The more complete the information on your product page, the bigger chance of selling. Write a proper description, tag them and placed them in a logical category.
- Product presentation is all about quality photos and visualization of your items. You might have an amazing product, but if people cannot see the quality and details of the item, they will most likely not end up buying it. From experience, we know that people don’t buy products that don’t have photos of them.
- Make sure to press ‘Update Shop Item’ after completing the information on the product page.
- Go to the ‘Pricing’ tab, select the materials to offer the product for sale in and price your models by setting the designer fee (mark up). The default material cannot be changed and the available materials, colors and finishes depend on the default material. When you’re ready, don’t forget to press ‘Update’.
- The sales price includes a 3% PayPal transaction fee. In case of price changes, the designer fee (percentage) stays fixed.